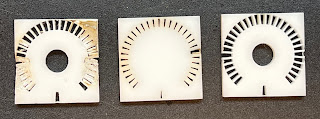
Today I laser cut some new cells for the led ring, the ones I posted about before the "pro" version arrived.
I first had a go with birch plywood. The thinnest version (0.3mm walls) broke apart but the others looked great.
I then moved to white acrylic, which was the one I had my hopes up for. The first try was a disaster, the cutout got too hot and melted back with the rest, and (i think) gas got trapped under the acrylic, starting small fires that burned away parts of the plastic.
Next up, I tried engraving. I had to engrave 30 times (!) to get through, and even then the hole on the back was much narrower than the one in front, so this was both not good enough and too time consuming.
Finally I turned down the power and speed up, from 100 power/20 speed to 90 power/40 speed. I also split the job into 10 parts, with each part only having the slits that were at 90 degree angles from one another, to keep the heat down. This worked wonders!
Then, almost as an afterthought I did a black MDF version, and also some thick black paper ones to put on top.
 |
| Left: LED PCB, black MDF and black paper with diffuser on the back |
When I got back home today, I set up a small test rig with a single LED connected to 5V through a 330Ohm resistor. I also put some white translucent paper ("matpapir", close to baking paper) behind the black paper to use as a diffuser.
 |
| Baking paper used as diffuser |
First try was the white acrylic. I had seen earlier that the sun shone through parts of it so I wasn't so sure about it anymore - and that turned out to be correct. The light leaks through the wall into the next cell.
 |
| Three layers stacked |
 |
| The bleeding is very visible already |
 |
| The results are very bad even with the diffuser |
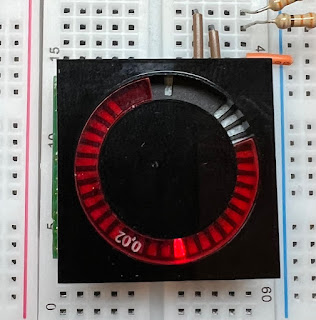
So the second try was the black MDF. It worked great! It's hard to show in the photos just how good it actually looks, but this is near perfect. When I bumped up the voltage to 8.8V it looked even better.
 |
| This! This is almost magical. No bleeding and a very visible red wedge. This is actually under strong white light too, so it's just amazingly good. |
Finally, I put the red lense over as I did on my previous trial and it looks good. I do think the 3mm red acrylic is a bit too thick though, it gets a bit hard to see everything from an angle. I have to think about other solutions to this.
 |
| With the red lense. The unlit segments are a bit too visible for my taste. I think using a "smoked" diffuser would improve this. It isn't as visible in real life though. |
 |
| my only concern is this - the red lense is 3mm thick, so when looking at the dial at an angle it's a bit hard to see the segment. |
 |
| It looks even better with a higher current, 8.8V through 330Ohm in this test. |


No comments:
Post a Comment