Not exactly a synth thing, but something that definitely needs to be documented. My machine is a WKR771 (WKR771WPS), but the same instructions apply to a lot of Miele models
The seal on my 5.5 year old washing machine broke two weeks ago, leading to the fun situation where the machine filled the towel drawers below with water and leaving us with no washing machine just as our youngest had stopped wearing diapers, meaning A LOT of dirty clothes.
Today the new seal arrived from Brøndum Elektro (a danish dealer that also sells to Norway). It took a long time, but their price was NOK 630, the only other supplier charged NOK 2300,- (about USD210 at the moment).
Now, to prepare myself I searched the net for how to replace the seal. I found several videos but none covered everything:
https://www.youtube.com/watch?v=6K375JeWVsw
https://www.youtube.com/watch?v=GLk8lucsmH0
https://www.youtube.com/watch?v=mi_znjVSoHk&t=34s
https://www.youtube.com/watch?v=j4IPS0wgc74
Uninstalling the old seal
Here is what I had to do:
Remove the top lid
First of all, you need to remove the front panel completely. To do this, start by opening the two small plastic lids on each side covering the screws. I did scratch the lids but it doesn't matter to me as they cannot be seen anyway.


Unscrew the two screws. You can now lift the top lid in front. Lift it all the way up and it can easily be removed.
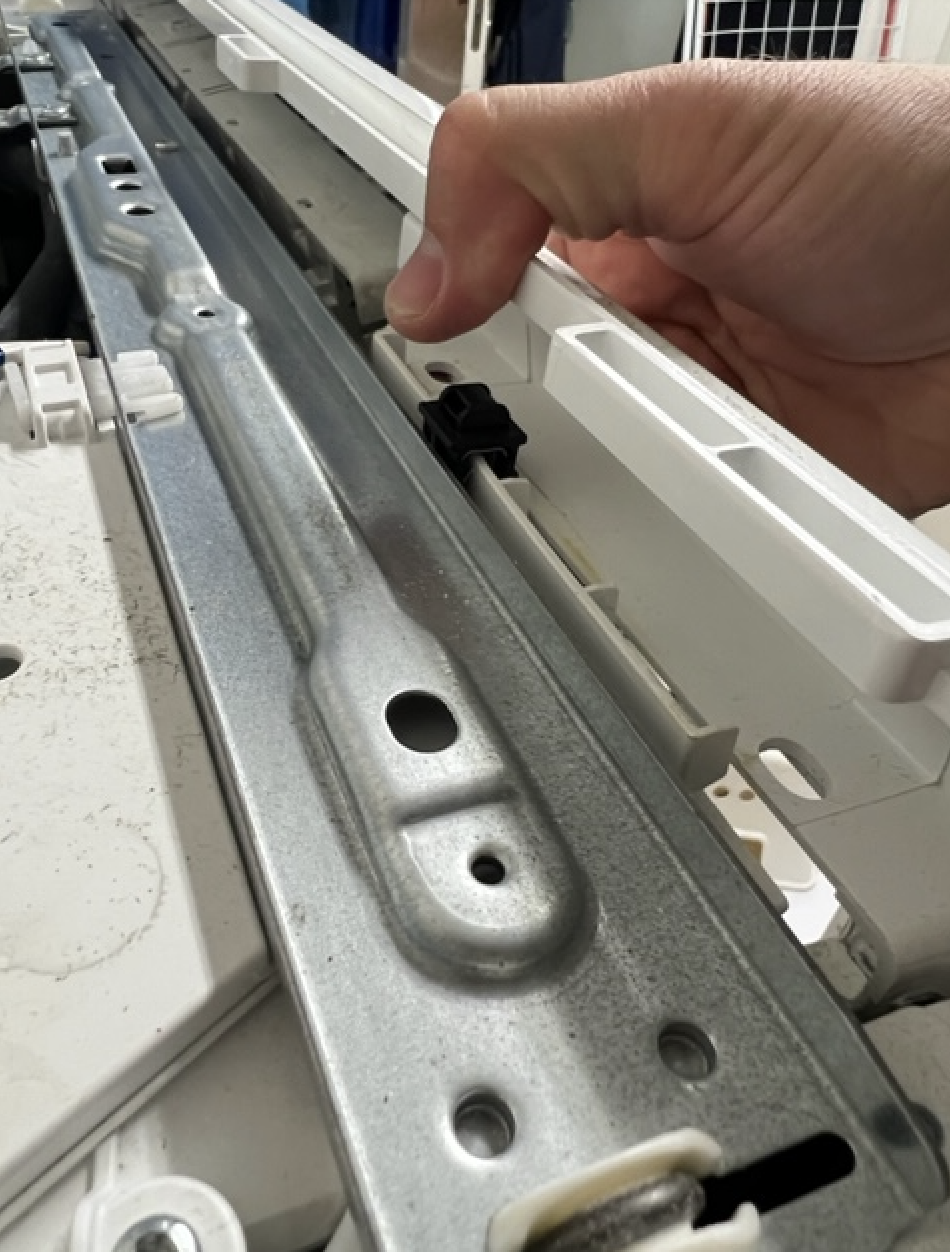
Remove the display/key panel
Next, remove the soap dispenser, and carefully pull forward on both sides of the plastic that holds the display and keys. Then pull everything up. The wires to the keys/display are a bit short but I managed to put the whole assembly on top of the washer without detaching the wires.
Detach the seal from the front
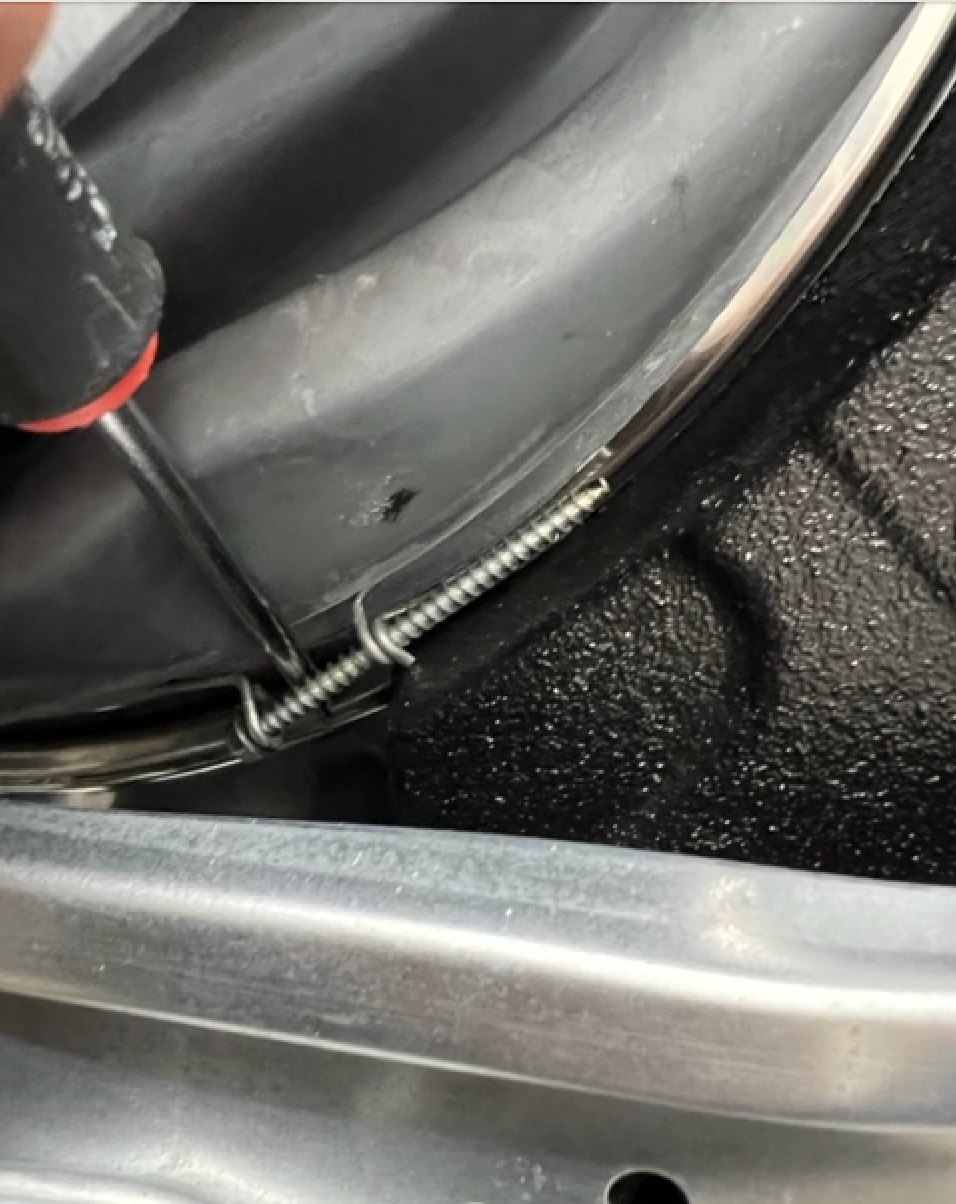
The seal is held in place by a steel wire with a spring on it. On my machine the spring is on the right side, by the door hinge, where the seal has a groove for it.

Use a flat head screwdriver to gently lift the spring. Once it is off, pull the seal lose.
Detach the front
The front is held in place by five screws: Two on the door latch, two on top and one large one below the center of the door.


Now, find a T30 and a T20 screwdriver (you use the T20 for everything except the large one). Start by unscrewing the door latch, then the big one and finally the two on top. Once the last screw is removed, the front is lose and will fall forward. Fortunately, it is stopped by two plastic latches. To release these, push them down. You should now be able to lift off the front.


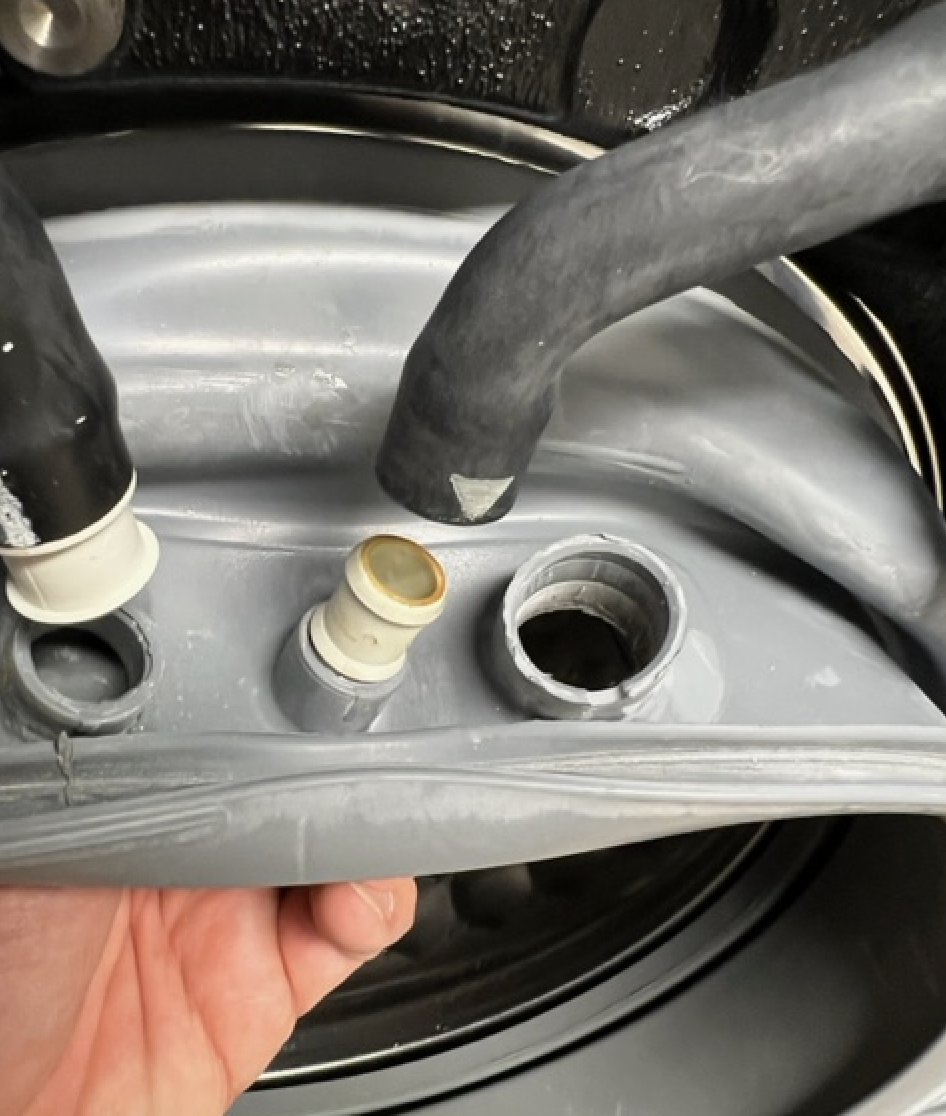
Remove the hoses and lights from the seal
There are two hoses and one light on top of the seal. The left hose can be removed with the white plastic still attached. The center hose must be disconnected from the white plastic as it is too big to go through the hole. Finally, the light can be pushed from below to detach it.

 |
| Remove the left hose with the white plastic still attached |
 |
| Detach the center hose from the white plastic |
 |
 |
| The white plastic will be reused |
 |
| Push from below |
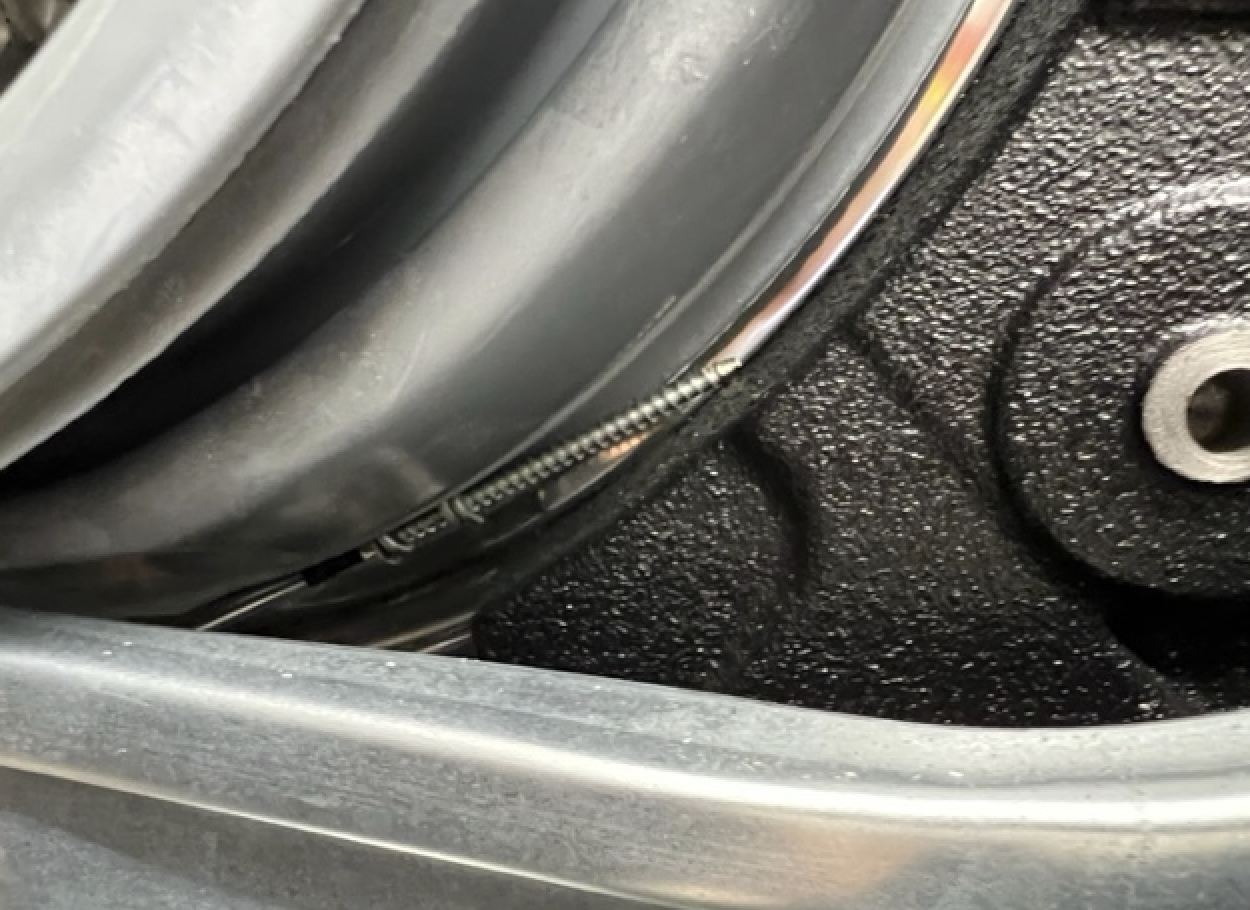
Release the seal from the inner ring
Finally, you need to release the seal from the machine core. It is attached using a second steel wire, but this time it is tightened by a T20 screw. On my machine this can be reached from below using a long screw driver, and was fairly easy to unscrew. Make a note of how tight it was fastened to make reattaching it easier.
 |
| The T20 screw should be reachable from below |

 |
| Gently pry loose the wire. |
One problem I had was that even if I unscrewed the screw, the wire did not pull apart very much. Just pry it loose using a flat head screwdriver.
Remove the seal.
It took a bit of force to remove the seal, but I just started at the side with the screw and worked by way around.

Phew - at this point I started sweating - removing the part wasn't that hard, but I was quite nervous about putting the new back on.
Installing the new seal
Attach the wire to the new seal
Looking at the wire, I realised that I could slide it further apart after removal. I unscrewed the screw even further, so the wire slid easily over the new seal.

Align the seal
This is the single most important thing. You need to make sure the draining holes are at the bottom center and that the holes on top align with the hoses and light. It is nearly impossible to move the seal after you've started putting this on so do it right the first time.
On some of the other videos they made a point of aligning the drainage holes at the bottom of the seal with holes in the inner ring. My machine does not have these holes in the inner ring, yet it is still important to make sure the holes are at the very bottom or water will collect at this point.
Fold the seal over the edge of the inner ring
This was actually much easier than I anticipated. The ring goes into a quite deep groove in the seal, so I just worked my way around, putting everything in place. Make sure the steel wire stays on the outside of the rear flange of the seal all the way. Also, make sure to align the tightening screw so that you can reach it from below.
 |
| Make sure the screw is reachable from the bottom |
Tighten the steel wire
Just screw the screw until it is as tight as it originally was. This went very smooth in my case.
Reattach the hoses
Putt back the two hoses and the light, make sure that the plastic parts are inserted all the way.
Attach the front panel
The front panel rests on two small white plastic parts. Align those with holes in the bottom metal of the front and gently push the front in place. Attach the two screws on top, the door latch and the big one below the door.

Attach the control panel
The panel slides down and is then pushed backwards until it snaps in place
Attach the seal to the front panel
This was way harder than I thought, but I ended up attaching the seal all the way around without the steel wire - as with the inner ring, I worked my way around while keeping an eye on the first point to make sure it didn't start slipping. I had to do this a few times before it snapped properly in place, but once it was on it stayed where it should

Attach the steel wire
This turned out to be a bit of a nightmare. Once again, you need to align the spring properly for it to fit in the groove by the door hinge.

I started on the left side and attached the top, then worked my way to the bottom while still holding the top in place, and pulling the spring apart slightly. It gets really tight and the wire starts dragging the seal away from the edge. I did at least five tried before I finally managed to get it on with a little help from a flat head screwdriver again (just make sure you don't ruin the seal). Make sure the whole seal looks even, I had to lift the spring a bit to release some parts that were stuck under the wire.
Reattach the lid
I tested the machine prior to this, just in case. The lid reattaches by placing it into two holes in the rear, then closing the front. Screw in the screws and pop in the lids.
Congratulations!
No comments:
Post a Comment