If possible, I want to have a continous ring clockwise from the left to where the current setting is. It may draw too much current, but for now that's my goal. I also want the end of the ring to be as sharp as possible - and in the event of having to use a single led at the time, having as little leaking light from the current led to the ones next to it. Finally, I want the light to be as uniform as possible.
To get distinct sections along the ring, I'm trying out light pipes, one for every LED. They need to have as smooth as possible sides to reflect the light and keep it contained within the pipe, and they must be separated to prevent leakage.
As I'm not sure about exactly how to do this, I made several prototypes:
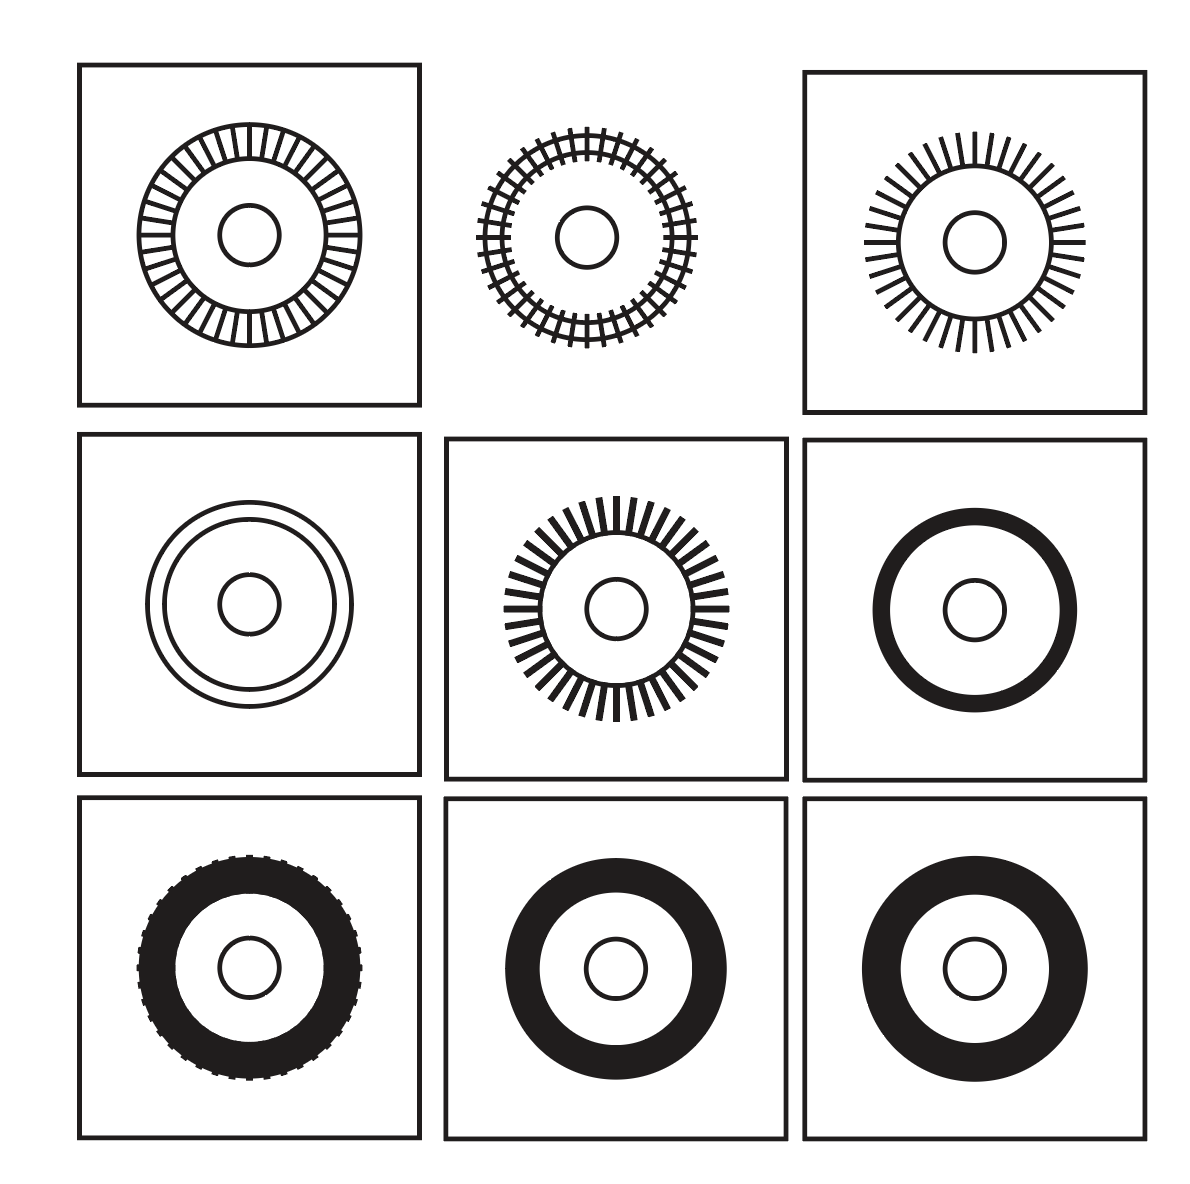
For the two first ones each light pipe is actually a separate piece of plastic. I thought that painting the sides of the pieces and glueing them back together could be an option.
Number three is a variation where all the parts are still held together at the edge. The gap between them is whatever the laser leaves behind when cutting the acrylic.
Row two: The first one is just to have somewhere to glue the pieces from the center one in row one, as I could not be bothered making the cut lines shorter.
For the center one, I've made the slits between the segments a little wider, my theory was that this would reduce leakage.
As for the four last ones, they test the second design goal - uniform light. Wherever there is black on the drawing there will be engraved white on the acrylic, effectively making a diffuser. There are two diffusers where I have not cut any lines, they will be used on top of the light pipe, and two where the segments themselves were diffused.
I quickly realised that painting and glueing the parts together is not a viable option. The parts are too small and there are too many of them.
The ones with laser-thin slits actually have quite wide slits as it is, so there was no need to widen them.
As for diffusers: Putting the diffuser on the segment means that the slits are still visible. Not a great look.
I also wondered if the diffusing layer should be on top or bottom. It definitely needs to go on top, as the light has to spread before it hits the diffuser.
To test the combinations I taped off a normal led so that it is as narrow as one segment. I put the diffuser layer with the diffuser down against the layer with the segments. The diffuser is clearly visible, the slits are mostly hidden. I would like the diffuser to be less visible, but I think that using red acrylic may help a lot here. Each layer in my test is 3mm btw, so this builds 6mm in addition to the height of the leds.
 |
| LED with tape on it to make it more narrow |
 |
| Segment layer |
 |
| Diffuser |
 |
| LED below one of the light pipes. |
 |
| Notice thast the gaps are slightly visible. I think this will improve slightly once the pot is put in a case as there will be no light coming from behind. |
 |
| With a randomly chosen cap on top. I think this looks great! This diffuser is 4mm wide, I also have one that is 2mm, making each segment almost square. I will test both to see which one I like the most. I will also put black acrylic in the centre of the ring (on the segment layer), and the diffuser layer will be cut so that only the ring protrudes through the front panel. |
This comment has been removed by a blog administrator.
ReplyDelete